-
Adding an Image to a Web Page
-
The role of images in a webpage
-
Specifying locations in web pages
-
Customizing Links
-
Exploring link options
-
Basic links
-
Why links?
-
Submit and Reset buttons
-
Multiline text boxes
-
Drop-down list fields
-
File upload fields
-
Hidden fields
-
Checkboxes and radio buttons
-
Password fields
-
Text fields
-
Input tags
-
Creating forms
-
How a form looks like?
-
Adding Headers Cells
-
Creating a Basic Table
-
Description list
-
Unordered list
-
Ordered list
-
Lists
-
More formatting elements
-
Other text elements
-
Working with language elements
-
Abbreviations, Definitions, Quotations and Citations
-
Creating Breaks
-
Basic text formatting elements
-
Creating a page from scratch using VS Code
-
Creating a page from scratch using Notepad
-
Setting Up the Basic Document Structure
-
Parents, Children, Descendants and Siblings
-
The Outer Structure of an HTML Document
-
Element Attributes
-
HTML elements
-
How HTML creates a website
-
Creating HTML markup
-
How a website works
-
Web Browsers vs Web Servers and Internet/HTTP
-
Webpage vs Website
More formatting elements
Paragraphs
Paragraphs appear more often than any other text block in web pages. HTML browsers don’t recognize hard returns that you enter when you create your page inside an editor. You must use a <p> tag to tell the browser to package all text up to the next closing </p> tag as a paragraph.
To create a paragraph, follow these steps:
1. Add <p> in the body of the document.
2. Type the content of the paragraph.
3. Add </p> to close that paragraph.
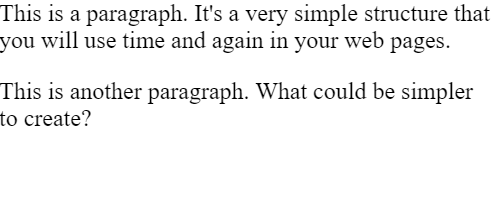
Here’s what it looks like:
<html>
  <head>
    <meta charset="UTF-8" />
    <title>All About Blocks</title>
  </head>
  <body>
    <p>
      This is a paragraph. It's a very simple structure that you will use time
      and again in your web pages.
    </p>
    <p>This is another paragraph. What could be simpler to create?</p>
  </body>
</html>
This HTML page includes two paragraphs, each marked with a separate <p> element. Most web browsers add a line break and a full line of white space after every paragraph on your page.

Headings
Headings break a document into sections. This book uses headings and subheadings to divide each chapter into sections, and you can do the same with your web page.
Headings do the following:
- Create an organizational structure.
- Break up the text flow on the page.
- Provide visual cues as to how pieces of content are grouped.
HTML includes six elements for different heading levels in documents:
- <h1> is the most prominent heading (Heading 1)
- <h6> is the least prominent heading (Heading 6)
Follow numerical order from lowest to highest as you use HTML heading levels.
To create a heading, follow these steps:
1. Add <hn> in the body of your document.
2. Type the content for the heading.
3. Add </hn>.
When used in this context, n means the number of the heading level you want to create. For example, to create a first-level heading, you would substitute the number 1 for n and would add <h1> to your page, for a second-level heading, add <h2>, and so forth.
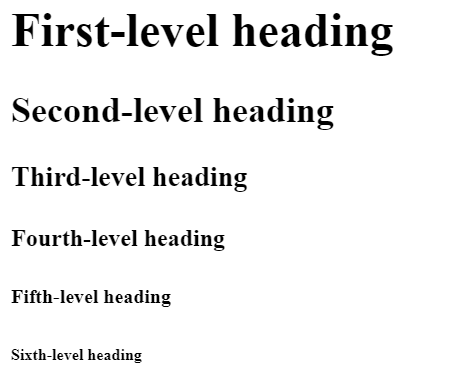
Most graphical browsers use a distinctive size and typeface for headings:
- First-level headings (<h1>) are the largest (usually two or three font sizes larger than the default text size for paragraphs).
- All headings use boldface type by default, and paragraph text uses plain (nonbold) type by default.
- Sixth-level headings (<h6>) are the smallest and may be two or three font sizes smaller than the default paragraph text.
The following snippet of HTML markup shows all six headings at work:
<html>
  <head>
    <meta charset="UTF-8" />
    <title>All About Blocks: Headings 1-6</title>
  </head>
  <body>
    <h1>First-level heading</h1>
    <h2>Second-level heading</h2>
    <h3>Third-level heading</h3>
    <h4>Fourth-level heading</h4>
    <h5>Fifth-level heading</h5>
    <h6>Sixth-level heading</h6>
  </body>
Horizontal rules
Using a horizontal rule element (hr) lets you include solid straight lines called rules on your page.
The browser creates the rule based on the hr element, so users don’t wait for a graphic to download. A horizontal rule is a good option to:
- Break a page into logical sections.
- Separate headers and footers from the rest of the page.
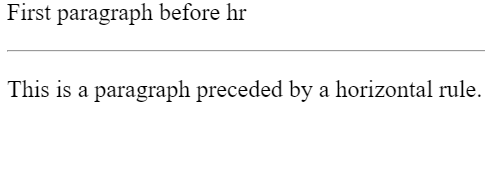
When you include an <hr> element on your page, as in the following HTML, the browser replaces it with a line as shown below.
<html>
  <head>
    <meta charset="UTF-8" />
    <title>Horizontal Rules Example: Praveen</title>
  </head>
  <body>
    <p>First paragraph before hr</p>
    <hr />
    <p>This is a paragraph preceded by a horizontal rule.</p>
  </body>
</html>
A horizontal rule always sits on a line by itself; you can’t add the <hr> element in the middle of a paragraph (or other block element) and expect the rule to appear in the middle of the block.
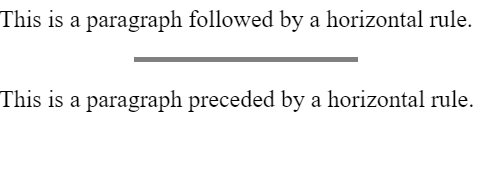
The following bit of HTML creates a horizontal rule that takes up 45 percent of the page width, is 4 pixels (px) high, is aligned to the center, and has shading turned off:
<html>
  <head>
    <meta charset="UTF-8" />
    <title>Horizontal Rules Example: Praveen</title>
  </head>
  <body>
    <p>This is a paragraph followed by a horizontal rule.</p>
    <hr width="45%" size="4" align="center" noshade="noshade" />
    <p>This is a paragraph preceded by a horizontal rule.</p>
  </body>
</html>
Note: These attributes are deprecated, and best replaced with CSS equivalents if this kind of behaviour is desired.
